Looking to add some personalization to your Kleenex® tissue boxes that match your home décor and personal sense of style? While some of us choose Kleenex® box colours and designs purposefully to match different rooms in our home – I know I do! – there are endless ways to add some creativity, colour and texture with this simple DIY Kleenex® tissue box cover.
Decorating Kleenex® boxes is a really fun craft activity you can do with your kids at home, allowing them to express their creativity.
The possibilities are truly endless!
Creating tissue box covers for your bedside, bathroom, powder room, kitchen, kids’ playroom, guest room or home office will add a refreshing look to an every day item.
Around my home, I always have a few boxes of Kleenex® facial tissues – Canada’s best tissue for everyday use, conveniently placed around my home. So, whether it’s wiping away happy tears, cleaning up life’s unpredictable messes, or helping my daughter with a sniffly nose, we always have empty Kleenex® boxes on-hand.
Through my tissue paper art & craft projects, I love motivating kids to get creative and have fun. For this project, with some imagination and basic sewing know-how, you’re on your way to creating something that will add some sparkle and joy to your home. If you’d like to create a unique Kleenex® tissue box cover without needle and thread, look for a pre-made wooden tissue box cover you can decorate and adorn. Consider painting it and gluing on gems or LEGO pieces for a simple project that’ll surely cheer up any room.
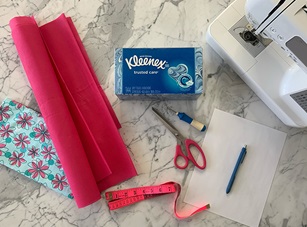
The supplies you’ll need for this DIY Tissue Box Cover project:
- A Box of Kleenex® Facial tissue (a box of 144 tissues was used for this example)
- Stitch ripper
- Flexible tape measure
- Pen and paper
- Fabric scissors
- Two contrast fabrics (a printed cotton twill was used and a solid non-woven polypropylene)
- Threaded sewing machine (if you don’t have a sewing machine, you can hand-sew the project together)
How to make a Kleenex®tissue box cover:
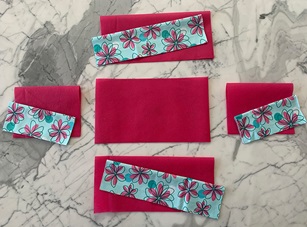
- Measure your Kleenex® Trusted Care® tissue box and record the dimensions of the fabric pieces you’ll need. Add 2 cm to each measurement before writing it down because you’ll be sewing with a 1 cm seam allowance. For the main fabric, you’ll need one top piece, two “front” pieces (a front and a back), and two side pieces. For the pocket fabric, use the same measurements as the front and side pieces (you’ll be folding the height in half, creating a lined pocket and eliminating the need for a seam finish at the top of the pocket).

- Cut your main and pocket fabric pieces following the dimensions above. (This image shows the pocket pieces folded in half vertically.)
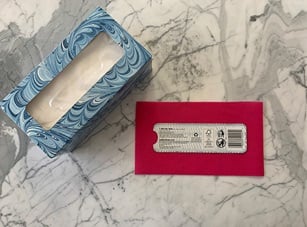
- Cut a centre hole in the top fabric piece. You’ll want this hole to be a bit smaller than the box opening (0.5 to 1 cm around all sides will be sufficient) in order to cover the entire cardboard box once the project is finished.
- Fold the pocket pieces in half vertically, and lay them on top of the corresponding main fabric pieces, lining up the raw edges at the bottom, leaving the fold positioned at the midpoint of the main fabric pieces.
- Sew the front and side pieces together end to end using a narrow zigzag stitch, backstitching at both ends. (You can hand-sew this if you don’t have access to a sewing machine.) Before you sew, make sure your fabric right sides are together, and make sure the pocket fabric pieces are sandwiched between the main fabric pieces. Sew all four sides together, creating a loop that will form the sides of the tissue box cover.
- Next, sew the top piece in place. Make sure you’re sewing the fabric right-sides together.
- When sewing around the perimeter of the top piece, affixing it to the looped sides from Step 5, sew the four sides as four separate seams, and leave a small gap at the beginning and end of each seam. This gap will create ease at the corners that will ensure perfect alignment of the finished cover.
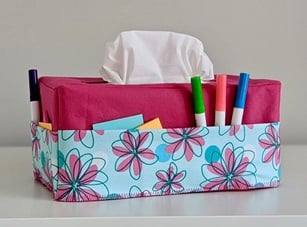
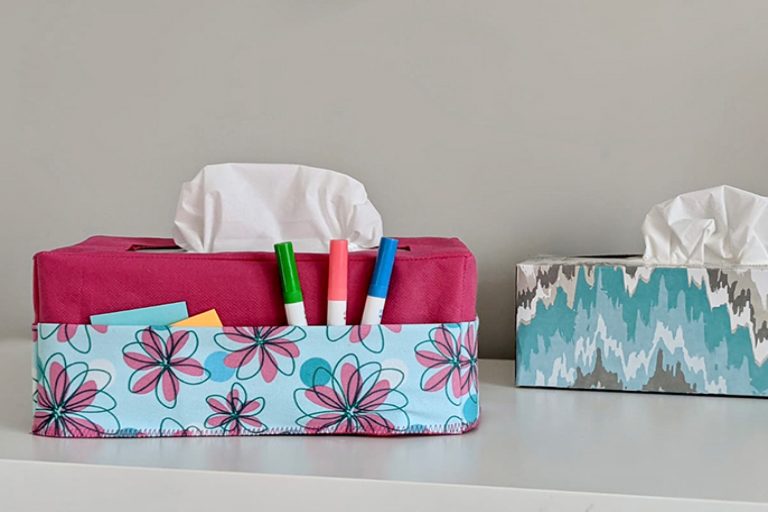
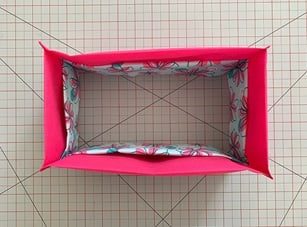
- Flip the project right-side out, and finish the raw edges along the bottom with an overedge zigzag stitch. Slide your sewn cover over your Kleenex® Trusted Care® box, and tuck various accessories into the pockets for easy access!
We can’t wait to see what imaginative tissue box covers you create. Make sure you tag @Kleenex and include the hashtag #KleenexCrafts.